|
ProFax
Posted by Dan Shelton, Last modified by Dan Shelton on Jun 14 2019 09:04 AM
|
|
|
As a ProFax subscriber you have several convenient ways to send and receive faxes. Sending FaxesFrom OutlookOutlook is the most convenient way to send faxes with ProFax. To send a fax from Outlook, you simply create an email and instead of sending it to an email address, you send it to the fax number @profaxsend.com. For example, [email protected]. The body of your email will become your fax cover sheet and any attachments will become your faxed pages. Make sure not to add punctuation to your number like ( ) or -. Just use the numbers and add @profaxsend.com To make it more convenient, consider creating a new contact group called "Faxes" for frequent numbers. You will receive a transmission report a few minutes after sending your fax.
From Office ApplicationsWhen working in Office applications, like Word or Excel, you can fax your documents directly by sending the document (emailing) to (FaxNumber)@profaxsend.com or by printing the document to the printer called ProFax Web Fax.
From the ProZone Application
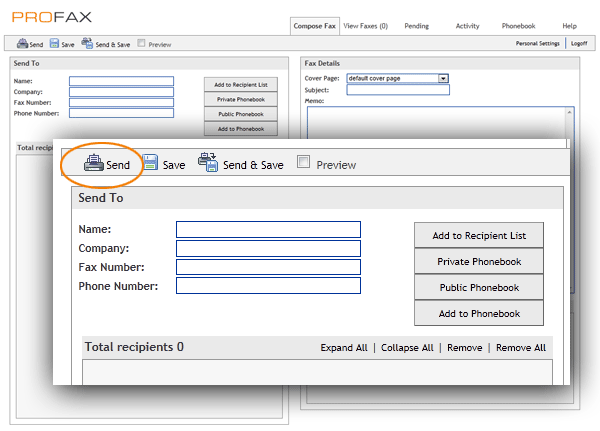
From Web InterfaceThe ProFax interface is fairly straight forward. To send a fax, click on the "Compose Fax" and you can address your fax on the top left, add comments to your cover page on the right and add attachments on the bottom right of the view. Once completed, press the "Send" button on the top left corner.
Receiving Faxes There are (4) ways that you may receive inbound faxes depending upon how your account was originally set up.
If you have any questions regarding how your fax works or is set up, please contact support at [email protected]. Web Interface Navigation Options There are (5) commonly used tabs on the navigation bar of the ProFax interface. On the submenu located next to the Logoff link, you can set your Personal Settings.
| |
|
|

 You can access the web client by clicking the ProFax Web Icon from the ProZone. You may have the option to set up single sign-on which will automatically log you into ProFax in the future.