|
Sharing Tasks in Outlook
Posted by Dan Shelton, Last modified by Dan Shelton on May 29 2019 05:40 AM
|
 |
Steps with a magnifying glass have an example image you may view. Click the magnifying glass to show or hide the associated image. |
To share a Task List in Outlook you must first set permissions for the users you wish to share your list and those users must connect to your task list in Outlook. A task list owner must give you permission before you can connnect to their task list.
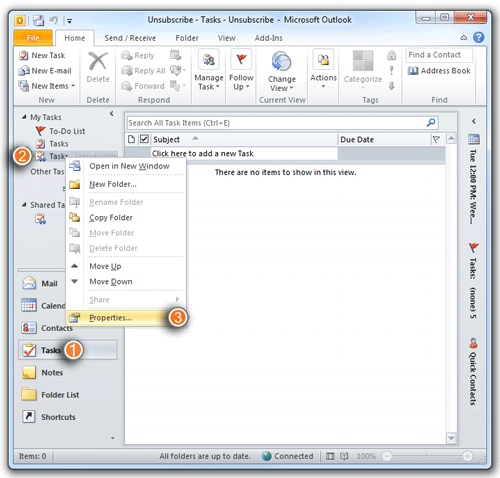
- STEP 1: SET PERMISSION TO ACCESS YOUR TASK LIST
- In Outlook, click the Task view (1) found in the left navigation panel then right click on the Task List (2) that you wish to share. Finally, click on Properties option (3).
 - In the Properties dialog, select the Permissions tab (1), Click Add to select the user(s) with whom you wish to share this task list (2). Finally, select the appropriate permission level (3) and click OK.
 |
Permission Level |
Definition |
| Owner: |
Allows full rights to the mailbox's task list , including assigning permissions; it is recommended not to assign this role to anyone |
| Publishing Editor: |
Create, read, edit, and delete all items; create subfolders |
| Editor: |
Create, read, edit, and delete all items |
| Publishing Author: |
Create and read items; create subfolders; edit and delete items created by the user. |
| Author: |
Create and read items; edit and delete items they've created. |
| Nonediting Author: |
Create and read items; delete items created by the user. |
| Reviewer: |
Read items. |
| Contributor: |
Create items. |
| None: |
No permissions are set for the selected user on the specified calendar or folder. |
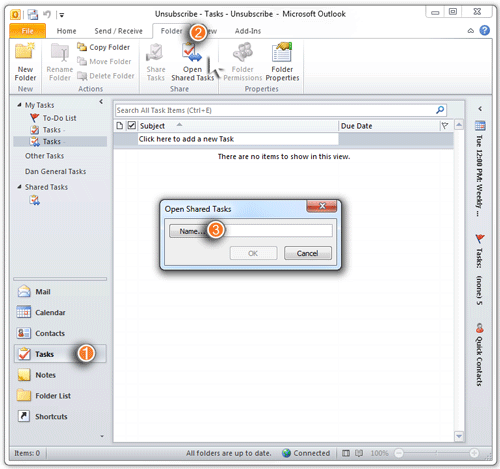
- STEP 2: CONNECT TO ANOTHER'S TASK LIST
- Select the Task view option from the left navigation bar
- Click on the Folder tab on the top navigation bar and click Open Shared Tasks menu item
- On the Open Shared Tasks... dialog, click the Name button to select the user whose tasks you wish to share.
|
|